Alright, so today I’m gonna walk you through how I tackled this “lamelo 2 scooby doo” thing I was messing around with. Buckle up, it’s a bit of a ride.
First off, I saw some chatter online about folks trying to make custom shoe designs inspired by, well, LaMelo Ball’s signature shoes and the Scooby Doo cartoon. It sounded kinda wild, so I thought, “Why not give it a shot?” I mean, I’ve dabbled in some basic image editing before, but nothing too crazy.
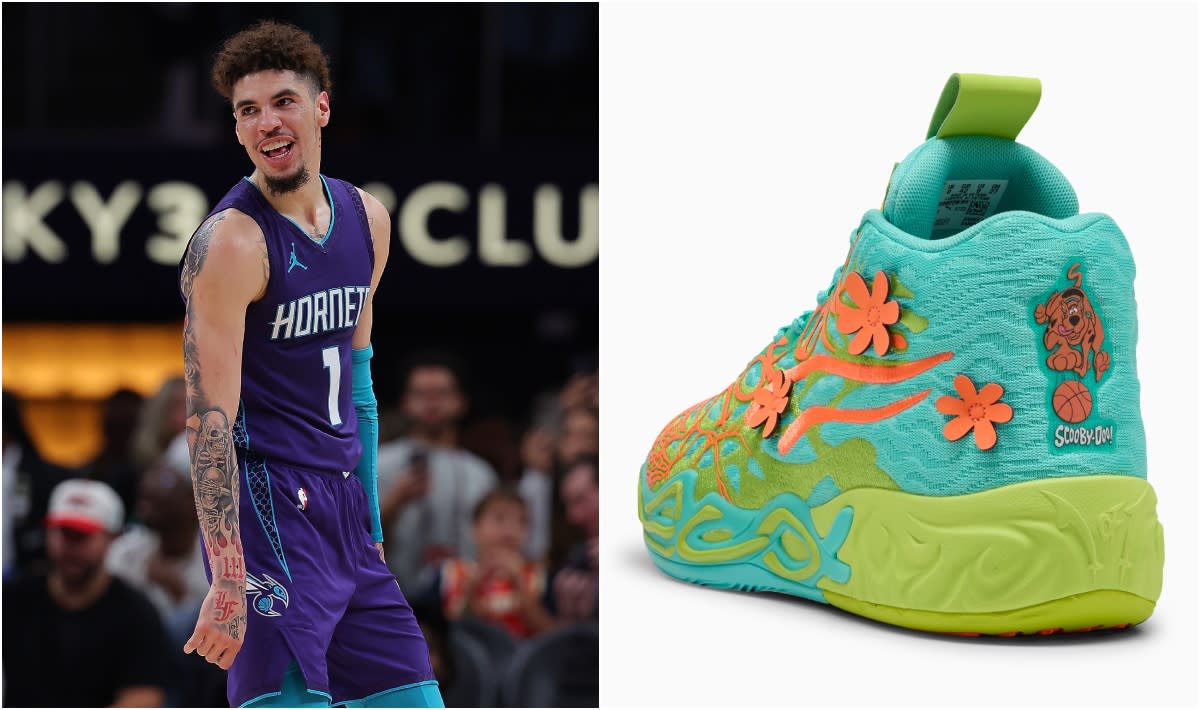
I started by grabbing some images. Lots of ’em. I needed clean shots of the LaMelo Ball 2 shoes from different angles. Google Images was my friend here. Then I needed a good stash of Scooby Doo stuff – the Mystery Machine, Scooby himself, the gang, the whole shebang. Made sure they were decent resolution, not some blurry garbage.
Next up, I fired up my trusty image editor. I’m no Photoshop wizard, I just use a free online one. It gets the job done. I loaded up a picture of the shoe that I thought had a good, clear profile. Then, the fun began.
I started layering in the Scooby Doo elements. I took the Mystery Machine and shrunk it down, trying to fit it along the side of the shoe, kinda like a racing stripe. It looked… rough. Really rough. But hey, gotta start somewhere, right?
Then I tried adding Scooby’s head near the heel. That looked even worse. It was all clashing, the colors were off, and it just looked like a jumbled mess. I realized just slapping stuff on wasn’t gonna cut it.

So I took a step back and started thinking about the color palette. The LaMelo 2s have some pretty bold colors, and Scooby Doo has its own vibe. I decided to try and match the shoe’s colors to the Mystery Machine’s. I used the color picker tool in my image editor to grab the blues and greens from the van, and then I adjusted the shoe’s color to match. It was a subtle change, but it helped tie things together.
After that, I experimented with different Scooby Doo logos and icons. Instead of just pasting random images, I tried using elements that felt more like a pattern. I found a picture of the Scooby Snacks box and extracted the little paw print design. I duplicated it and arranged them along the midsole, like a subtle texture. That looked way better!
I spent a good couple of hours tweaking, erasing, and re-layering. I added some shading to make the Mystery Machine look like it was actually part of the shoe, not just pasted on. I even added some little details, like the “SD” logo on the tongue.
In the end, it didn’t look perfect, not by a long shot. But it was a fun little project, and I learned a few things about image editing along the way. The result? A kinda goofy, kinda cool, definitely unique LaMelo 2 “Scooby Doo” design. I wouldn’t wear ’em out, but it was a cool exercise!
- Grabbed images of the shoes and Scooby Doo stuff.
- Fired up the image editor.
- Layered in the Scooby Doo elements, but it looked rough.
- Matched the shoe’s colors to the Mystery Machine’s.
- Experimented with patterns and details.
- Tweaked and erased until it looked kinda decent.
Moral of the story? Just dive in and try things out. You might surprise yourself, and even if you don’t, you’ll still learn something. Plus, it’s a fun way to kill an afternoon!
