.")
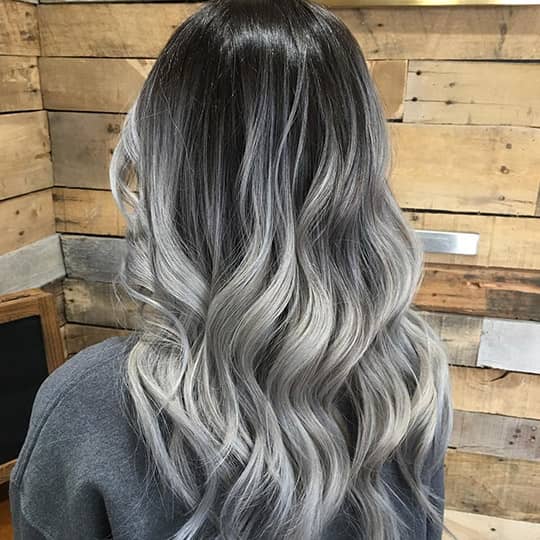
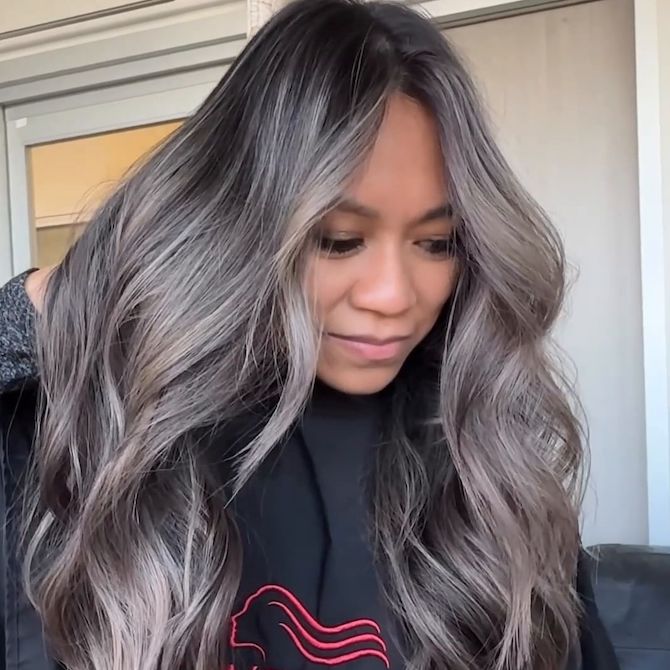
Alright, so you’re eyeing that black and grey balayage, huh? It’s a sharp look, no doubt. I’ve been down this road myself, and let me tell you, it’s a bit of a journey, especially getting that blend just right. It’s not just slapping some dye on and calling it a day, not if you want it to look decent anyway. I figured I’d share how my attempt went, step by step.
Getting Prepped: The Game Plan
First things first, I had to be honest about my starting point. My hair was pretty dark, almost black naturally. So, I knew lifting it to a point where grey would actually show up as grey, and not some weird muddy blonde, was going to be the main event. You can’t just go from black to silver-grey in one gentle step, not usually.
Here’s what I gathered for my mission:
- Bleach powder: Got a decent quality one. Didn’t want to skimp here.
- Developer: I went with a 20 volume, maybe a 30 for some stubborn parts later, but started gentle. You can always go up, but you can’t undo fried hair.
- Gloves: A must. Like, a box of them.
- Mixing bowl and brush: The non-metallic kind, obviously.
- Clips: For sectioning. Lots of them.
- Old towels and an old t-shirt: Bleach gets everywhere, trust me.
- Toner: This is key for the grey. I picked up a good silver/grey toner and a violet-based one too, just in case I needed to knock out yellow tones.
- Patience: Not sold in stores, but you’ll need a ton of it.
I covered my bathroom floor with old newspapers. Looked like I was about to paint a mural, not do my hair. But better safe than sorry with bleach stains.
The Bleaching Battle
Okay, this is where the real work began. I sectioned my hair meticulously. Think four big quadrants, then smaller sections within those. I wanted that balayage look, so freehand painting, focusing on the mid-lengths and ends, leaving my roots darker for that natural grow-out.
I mixed the bleach and developer until it was like a thick yogurt. Not too runny, not too clumpy. I started applying it from the bottom sections of my hair, working my way up. And I was careful not to overlap too much if I had to reapply later. The ends usually process faster, so I kept an eye on those. I left about an inch or two from my scalp untouched to start with for that balayage effect and to avoid hot roots.

Then came the waiting. And checking. And more waiting. I’d peek at a strand every 10-15 minutes. It’s super important not to just set a timer and walk away. You gotta watch how your hair is lifting. My goal was a pale yellow, like the inside of a banana peel. Not orange, not fiery red. That pale yellow is the canvas you need for grey.
This took a while. My hair is stubborn. I think I had the bleach on for a good 40-50 minutes, but again, this totally depends on your hair. Don’t just copy my timing. Watch your own hair!
Rinse and Tone: The Moment of Truth
Once I got to that pale yellow stage, I rinsed everything out like my life depended on it. Lukewarm water, very thorough. My hair felt a bit like straw, which is normal after bleaching, but I was gentle.
Now, for the toner. This is where the grey magic is supposed to happen. I mixed up my chosen grey toner with a low-volume developer, as per its instructions. Applied it all over the bleached sections, making sure everything was saturated. The toner often looks scary dark purple or blue when it’s on, but don’t panic. That’s usually how it cancels out the yellow to make grey.
I watched it like a hawk. Toners can work fast. Left it on for maybe 15-20 minutes, until I saw that nice silvery, ashy grey color developing. Then rinsed again, and this time, I followed up with a deep conditioning mask. My hair was screaming for moisture.
What I Learned the Hard Way
My first ever attempt at something like this, years ago? Not so smooth. I rushed the bleaching, got impatient, and ended up with some brassy, orange-ish streaks instead of a cool grey. It was a bit of a disaster. I learned that patience with bleach is everything. And that if your hair isn’t light enough, the grey toner will just make it look muddy or greenish. Not cute.
This time around, I was much more careful, much more patient. The difference was night and day. I also learned that sometimes, you might need to tone twice, or use a purple shampoo regularly to keep the grey looking fresh and not brassy. That grey is a high-maintenance shade, for sure.
The Aftermath and Upkeep
After it was all dried and styled, it looked pretty good! That contrast between the dark roots and the smoky grey balayage was exactly what I was aiming for. It wasn’t salon-perfect, maybe, but I did it myself, and I was proud.
The upkeep is real, though. I use a sulfate-free shampoo for colored hair, and a purple or blue shampoo once a week to fight off any yellow tones trying to creep back in. And deep conditioning treatments are my best friend now.
So, that was my black and grey balayage adventure. It took time, a bit of mess, and a whole lot of checking, but it was doable. If you’re thinking of trying it, just be prepared, be patient, and don’t be afraid to do a strand test first! Seriously, that little test can save you a world of trouble.
