
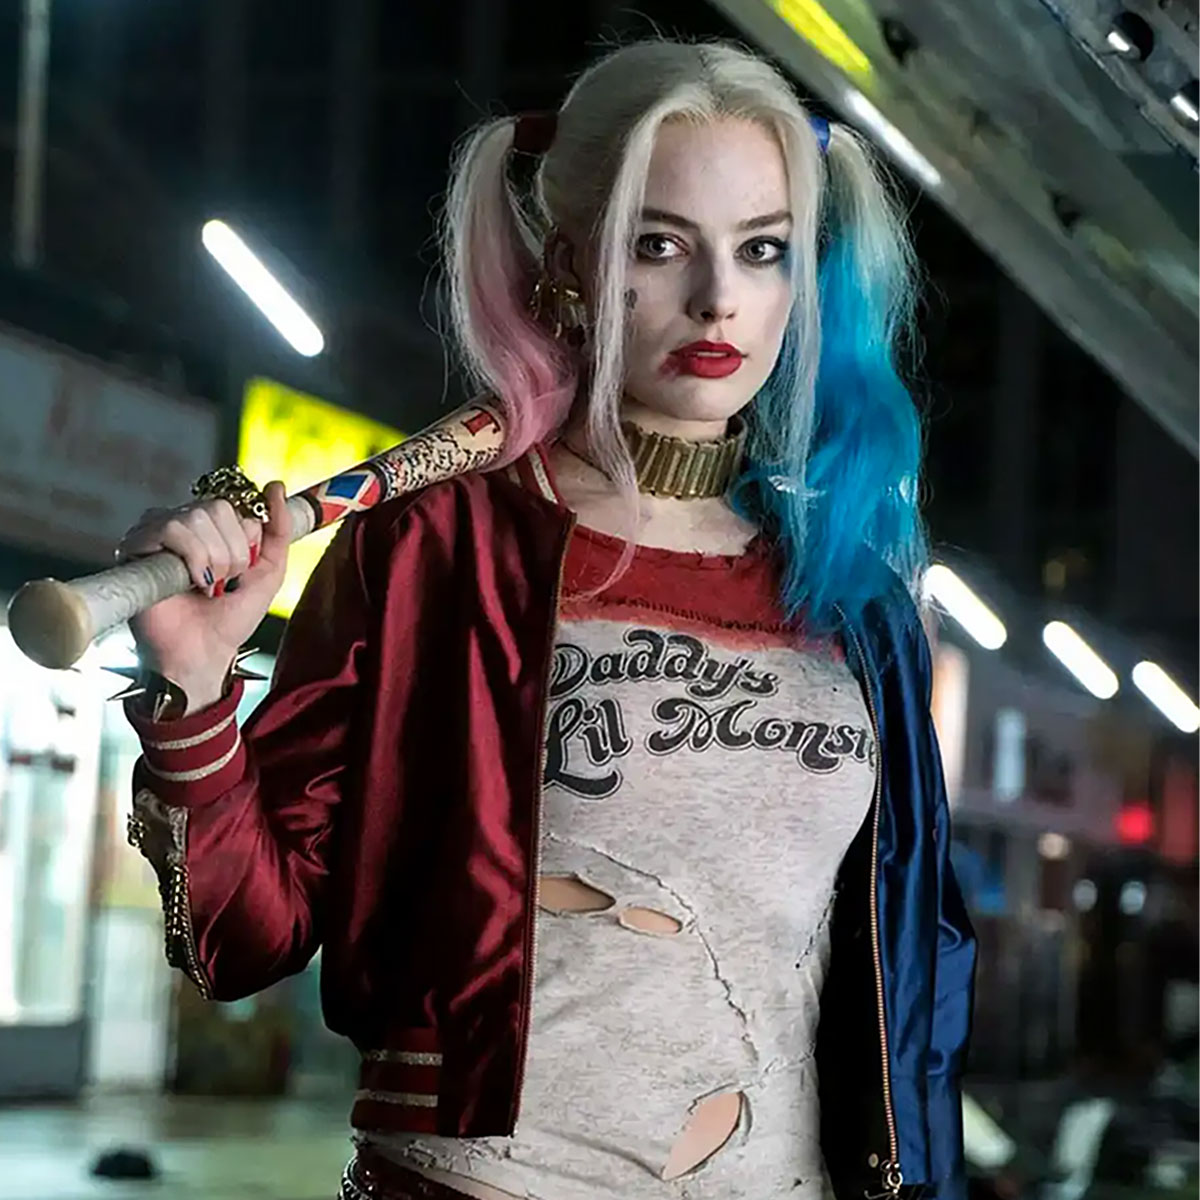
Alright, so I decided to tackle the Margot Robbie Harley Quinn costume. Man, did I underestimate the sheer number of bits and pieces to get this look right. It wasn’t just a throw-on-and-go kind of deal, not if you wanted it to actually look like her Harley.
The Main Outfit Pieces
First things first, that “Daddy’s Lil Monster” shirt. I looked around, and sure, you can buy them. But I’m a bit stubborn, so I thought, “How hard can it be?” I grabbed a plain white baseball tee with red sleeves – finding one that wasn’t too thick or too flimsy was a mission in itself. Then came the lettering. I ended up making a stencil. Printed the words, carefully cut them out with a craft knife – my fingers were cramping – and then used fabric paint. It took a couple of coats, and a whole lot of patience waiting for it to dry without smudging. Getting the slightly distressed, worn look was another layer of fiddling, a bit of light sanding here and there once it was dry.
Then, the shorts. Those tiny red and blue sequin shorts. I swear, I scoured every online shop and thrift store for weeks. You’d think something so specific would be easy to find with the movie’s popularity, but nope. I eventually found a pair of plain blue sequin shorts and a pair of red ones. My grand plan was to cut them in half and sew them together. Let me tell you, sewing sequins is a nightmare. Needles breaking, sequins flying everywhere. In the end, I kind of Frankensteined them together. It wasn’t fashion runway quality, but it did the trick from a distance.
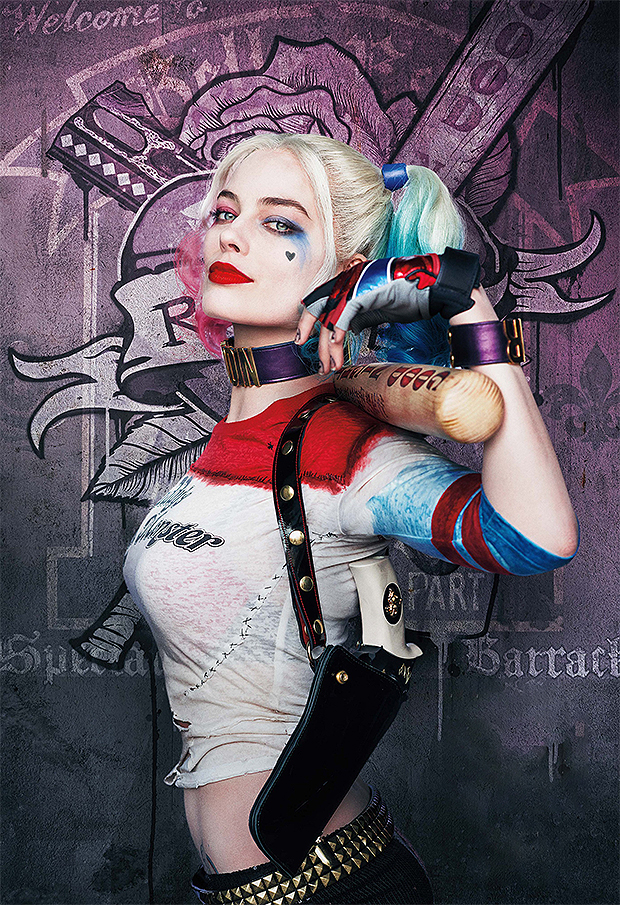
The jacket. Oh, the jacket. This was the big one. I needed a red and blue bomber-style jacket. Finding one that wasn’t ridiculously expensive was the first hurdle. I lucked out at a second-hand place with a plain satin-ish blue one. The red part? I bought red satin fabric and basically rebuilt one sleeve and one side of the front panel. My sewing machine was not happy with me. Then came the “Property of Joker” on the back. Gold fabric paint and another stencil. I must have measured and re-measured that placement a dozen times. And the gold trim along the edges – that was hand-stitched on. My back ached for days after hunching over that thing.
Accessories – The Devil’s in the Details
You can’t be Harley without the “PUDDIN” choker. I thought about buying one, but again, the DIY bug bit. I got some wide white ribbon and a pack of those gold letter studs you can find at craft stores. Punching the holes for the studs without making the ribbon fray was a bit finicky. Used a bit of clear nail polish on the edges to stop it unraveling. Simple, but effective.
The belt. Studded, obviously. I found a cheap black belt and a bunch of pyramid studs. More punching holes and clamping studs. It felt like an assembly line by that point. And the unique buckle – I couldn’t find an exact match, so I had to improvise with something that had a similar vibe and painted bits of it.
She has that one glove, right? A sort of fingerless, studded thing on one hand. I actually had an old black faux leather glove. Chopped the fingers off, added a few more studs for good measure. Done. That was one of the easier bits, thankfully.
And the fishnets! Easy peasy, just bought a pair. But then I had to strategically rip them. You want them to look artfully distressed, not just like you got mauled by a cat. So, a bit of careful tearing and pulling here and there.
Props and Styling
The “Good Night” bat. I wasn’t about to carry a real wooden bat around. So, I found a lightweight plastic toy baseball bat. Base coat of white paint, then I hand-painted the “GOOD NIGHT” and all the other little scribbles and doodles she has on it. I spent ages looking at screenshots to get those details somewhat accurate. It’s surprising how much personality those little drawings add.
Footwear. White heeled lace-up boots. This took some searching. I wanted them to have that slightly chunky look but still be wearable. I found a pair that was almost right and then just swapped out the laces for ones that looked more screen-accurate.
Finally, the hair and makeup. This is where it all comes together.
- I already had blonde hair, but for the pigtails, I got temporary hair chalk spray – one pink, one blue. Applied it liberally to the ends of my pigtails. It gets everywhere, by the way. Cover your shoulders.
- The makeup: pale foundation, super pale. Then the signature mismatched eyeshadow, smudged like crazy. One eye blue, one eye pink/red. Lots of black eyeliner, also smudged.
- The tiny heart tattoo under one eye, and “ROTTEN” on the jawline. I used a good quality liquid eyeliner pen for those. It took a steady hand, let me tell you. And red lipstick, of course, slightly smeared.
Putting it all on, piece by piece, after all that work… yeah, it felt pretty good. It wasn’t a quick project, and there were definitely moments I wanted to just give up and buy the whole damn thing pre-made. But honestly, wrestling with those sequins and painting that jacket, it made wearing it feel like a real achievement. It wasn’t perfect, some stitches were a bit wonky, and the paint wasn’t Hollywood-grade, but it was my Harley Quinn. And that’s what matters, right?