
Alright, let’s dive into my latest sneaker project: the Black Gold Jordan 5. Been wanting to do this for a while, and finally got around to it.
The Prep Work: First things first, gotta find the right pair. Scoured eBay and GOAT for a decent pair of beaters, Jordan 5s specifically. Found a pair with the right shape and size, but the original colorway was…rough. Perfect!
Stripping It Down: Next, the real fun begins. I completely disassembled the shoes. Took out the laces, removed the insoles, and then went to town with acetone to strip off the old paint and finish. This part is messy and takes forever, but it’s crucial to get a clean base.
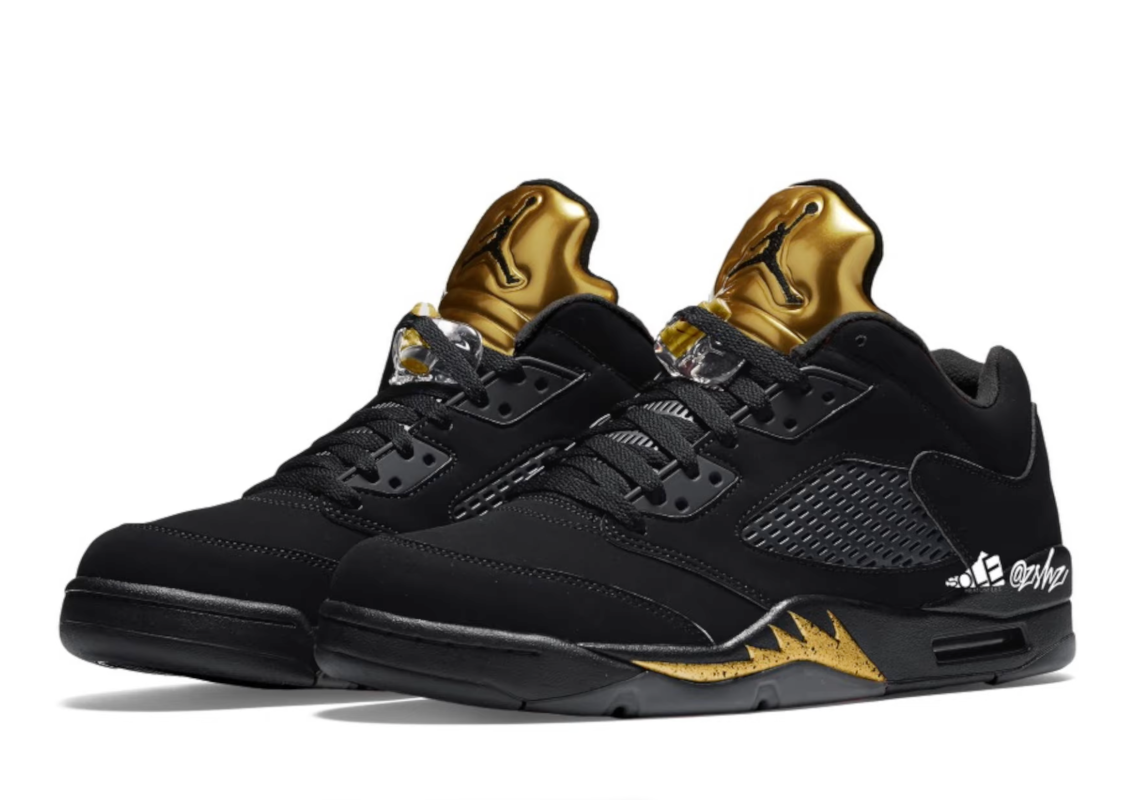
The Color Scheme: The vision was always black and gold, classy and clean. I opted for a matte black base using Angelus leather paint. This stuff is the real deal, flexible and durable. Applied several thin coats, letting each dry completely before the next.
Gold Accents: Now for the bling! I used a metallic gold paint for the Jumpman logos on the tongue and heel, as well as some detailing on the midsole. Used masking tape to get those crisp, clean lines. Patience is key here, my friends.
Midsole Magic: The midsole needed some love too. I decided to keep some of the original detailing but added gold speckles to tie it all together. Used a toothpick to carefully apply the speckles, one by one. Time-consuming, but worth it.

Laces and Finishing Touches: Found some black waxed laces with gold tips to complete the look. Added a couple of coats of matte finisher to protect the paint and give it a uniform look. Then, reassembled the shoes, making sure everything was snug and secure.
The Result: Boom! A custom pair of Black Gold Jordan 5s. They look completely different from the original beaters I started with. I’m stoked with how they turned out. A proper head-turner, if I do say so myself.
Lessons Learned: This project taught me (again) the importance of prep work. A clean base is essential for a good finish. Also, thin coats of paint are always better than thick ones. And lastly, don’t rush the details – they make all the difference.
- Disassemble everything carefully.
- Use quality paint and finisher.
- Be patient and pay attention to detail.
That’s it for this project! Let me know what you think, and what customs I should tackle next!