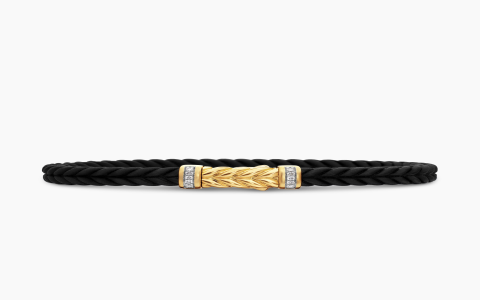
Alright, so I’ve been seeing those David Yurman bracelets everywhere, you know? The ones with the chunky, twisted cable design. Super cool, super classic. But then you look at the price, and, well, let’s just say my wallet and I had a little chat, and it was a firm ‘no’. Those things are definitely an investment, and while I get they’re high-quality and timeless, I just wasn’t ready to drop that kind of cash.

So, I got this idea. Why not try to make something inspired by them? I’m pretty handy, or at least I like to think I am. How hard could it really be to get that twisted look? Famous last words, right?
Getting Started and Gathering Stuff
First things first, I needed materials. This was a bit of an adventure on its own. I spent a good while online, then at a couple of craft stores, trying to find the right kind of wire. I wanted something that had a bit of heft, something that looked like it could be a cable. I ended up with some thicker gauge aluminum wire and some thinner stuff for wrapping, thinking that might do the trick. I also grabbed some end caps – not the fancy gemstone ones, just some plain metal ones I thought I could work with, and a decent clasp.
The Twisting Saga
Okay, the twisting. This was where the real “fun” began. My first attempt was a disaster. It looked less like a sleek cable and more like something my cat had a fight with. I tried twisting it by hand, then with pliers. I probably watched about a dozen videos of people making twisted wire jewelry. It took a lot of practice, and a fair bit of wasted wire, if I’m being honest. My fingers were pretty sore after the first evening of just trying to get a consistent twist. I learned that slow and steady was definitely the way to go. I even rigged up a little something with my hand drill on a super low speed to help get the main twist more uniform for a couple of the base wires I was working with. That was a game changer, sort of.
Then, if I was trying to get that look with multiple strands, I had to figure out how to bind them together without it looking all lumpy. More trial and error. Lots of taking things apart and starting over. I kept thinking about how those real Yurman pieces are so perfectly done – clearly, there’s a lot of skill and probably some specialized tools involved that I definitely don’t have in my kitchen drawer!
Those Darn End Caps
Once I finally got a piece of twisted wire that I didn’t immediately want to throw across the room, it was time for the end caps. This was another hurdle. Getting them to sit straight, making sure the glue held (I used a strong jewelry epoxy), and trying to make it look somewhat professional, or at least not obviously homemade from ten feet away. It was fiddly work. I had to be super patient, letting things dry properly. I even tried to gently hammer some texture onto a couple of the plain caps to make them look a bit more interesting, a bit more like the real deal’s textured metal.

The Final Result – Not Too Shabby!
So, after a weekend of messing around, a few frustrated sighs, and a small pile of wire scraps, I actually ended up with two bracelets that I’m pretty pleased with! They’re definitely not David Yurman originals, not by a long shot. You can tell they’re handmade. But they have that vibe, that chunky, cabled look I was going for. They feel sturdy enough, too. I wanted something that felt like it would last, you know, something with that timeless appeal, even if it was my own humble version.
Here’s what I ended up with:
- One thicker bracelet, made from a core of twisted aluminum wires, with some simple silver-tone end caps.
- A slightly thinner one where I tried to wrap a finer wire around the twisted core, giving it a bit more texture.
Honestly, I was surprised they turned out as well as they did. It was a good learning experience. Made me appreciate the craftsmanship that goes into the real designer pieces even more. Plus, now I’ve got a couple of unique accessories that I made myself, and that’s pretty cool. Every time I wear them and someone compliments them, I get to say, “Thanks, I made it!” And that feels pretty good, not gonna lie.
It’s definitely a fun project if you’re patient and don’t mind a bit of a challenge. And hey, it saved me a whole bunch of money, even if it cost me a bit of sanity along the way!

