")
So last week I was staring at this plain table, right? Totally boring. Needed some texture but didn’t wanna buy expensive fabric. Figured, hey, why not try making my own black fabric texture? Sounds wild, but honestly, just grabbed stuff I had lying around. Cheap and cheerful.
Gathering My Messy Supplies
Okay, first things first. Raided my garage and the kitchen. Didn’t go buy anything fancy. Here’s the mess I collected:
- Just regular black acrylic paint. The cheap kind.
- Plain white cotton fabric. Like an old pillowcase I wasn’t using. Anything thin works.
- Big plastic bowl I don’t care about getting ruined.
- Water. From the tap. Obviously.
- Salt. Yep, kitchen salt. The finer grain stuff.
- A piece of cardboard. For drying. Whatever was in the recycling bin.
Mixing Up the Gunk
Poured the black paint into the plastic bowl. Not measuring – just eyeballed it. Looked thick, so I splashed in some water. Maybe a bit less than the paint? Kept stirring with a stick I found outside until it felt runny, like… like thin syrup? Yeah, that felt right.
Grabbed the salt next. Just dumped in a bunch. Maybe two big spoonfuls? Honestly, no clue. Stirred it like crazy until the salt kinda disappeared into the black goo. It wasn’t smooth anymore, felt gritty. Important bit: really stir the salt fully in. Don’t want big lumps.
Dunking the Fabric
Flopped my white cotton into the mix. Used hands (wearing gloves? Nope!) to push it down. Made sure every part soaked up the black soup. Squished it around a bit, maybe squeezed it slightly to get rid of some big drips. Not gonna lie, it felt kinda gross and sticky.
The Drying Disaster Zone
Pulled the soggy black mess out. Tried not to fling salt-paint everywhere. Draped it over the cardboard. Smooshed it flat-ish. Looked like a weird dark blob. Left it outside. Thought it would take hours? Checked after like 45 minutes… mostly dry to the touch already. That salt really sucks the moisture out!
Magic? Just Salt.
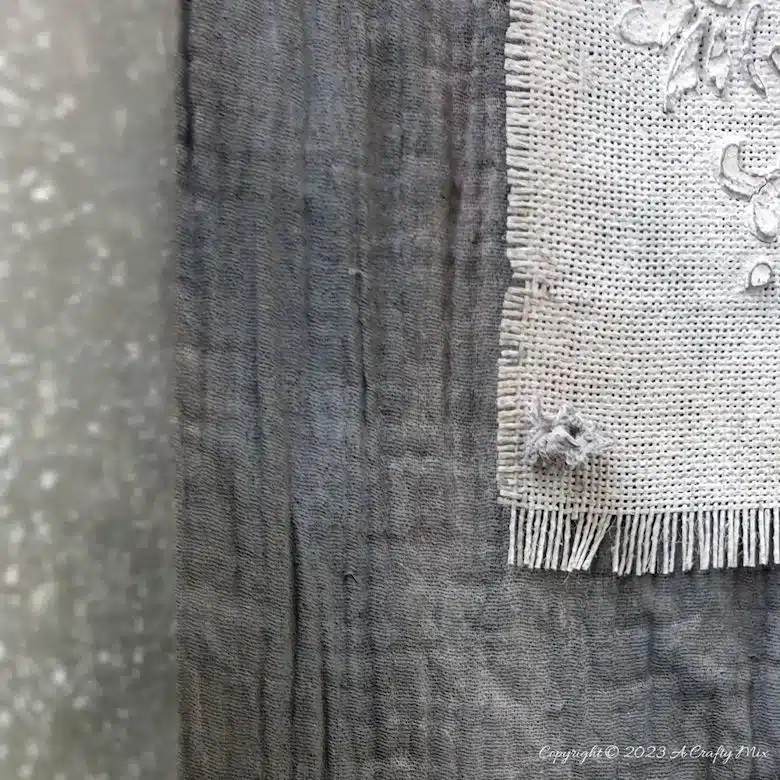
This is where the cool thing happens. Because the salt pulls water out faster from some spots than others, it leaves crazy patterns. Mine dried with all these little whitish spots surrounded by darker areas. Looked like… lichen? Or some weird stone? Not smooth at all! Exactly the grittiness I wanted.
The salt crystals basically made little paths for the water to escape unevenly. Science!
Does It Stick? The Crucial Part.
Dry? Check. Looks cool? Check. But will it stay? Gotta fix it. Ironed that thing flat. Medium heat on the iron. Just slowly went over the whole piece. Heard tiny crackles? That’s the leftover salt breaking. Important: Did it inside out first to be safe. Then did it again right side up. Basically cooked it a bit.
So… Did It Work?
Yeah! Honestly surprised. It looks really textured and deep. Not just flat black. Those salt marks stayed! It feels stiffer than before, which is fine for the table cover. Definitely doesn’t look like a boring pillowcase anymore.
Totally not perfect though. Some spots darker, some lighter. Got a couple small holes where maybe the salt clumped too much? But hey, that just makes it look more real and weathered. I wasn’t aiming for perfect factory stuff anyway.
Guess regular folks like us can just mix paint, water, and salt and make something kinda awesome. Super cheap, took like… an hour tops with drying. Give it a shot! Messiest part was washing my hands afterward.