")
My Journey into Face Threading at Home
Alright, let’s talk about face threading. I got tired of the whole salon routine and the cost, plus sometimes you just notice those annoying little hairs right when you don’t have an appointment. So, I figured, how hard can it be? I decided to give it a shot myself.
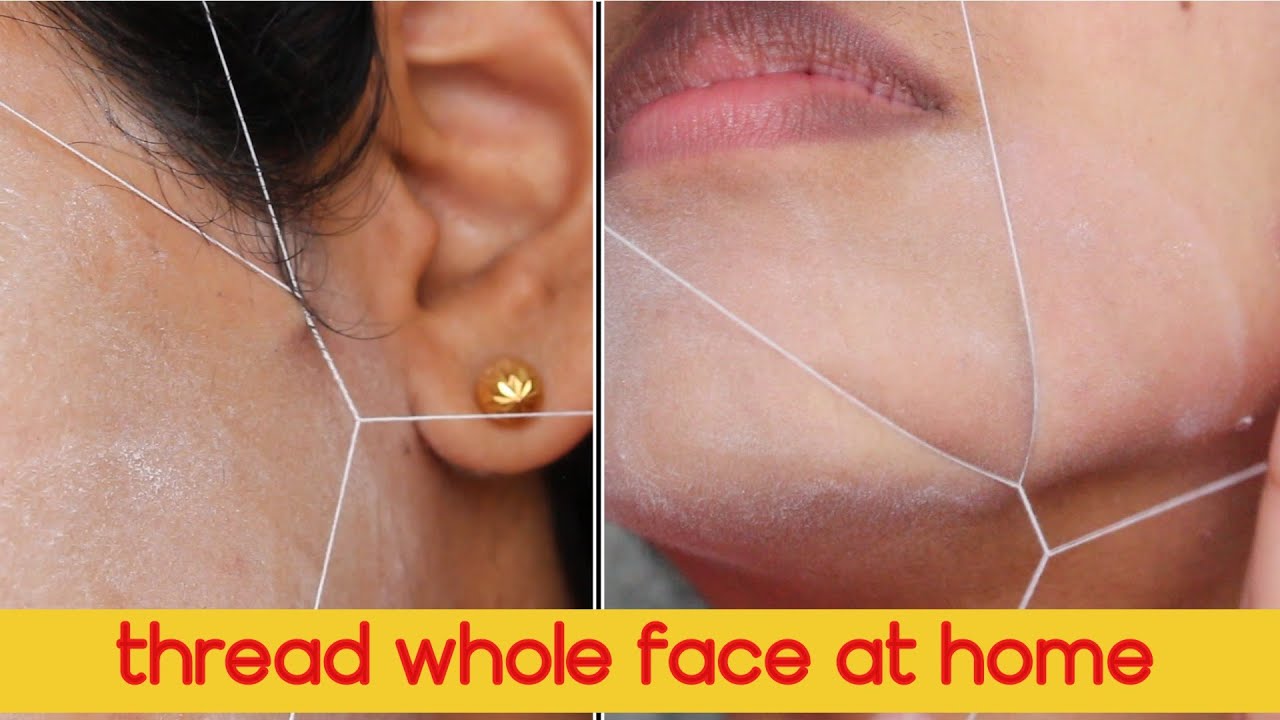
First things first, I had to get the gear. Just needed some proper threading thread, the kind they use in the salons, not just any old sewing thread. Found some online pretty easily. Seemed simple enough.
Getting Started: The Awkward Phase
Okay, watching videos makes it look smooth as butter. Doing it? Not so much. Getting the thread setup was the first hurdle. You gotta cut a decent length, tie it into a loop, and then twist it in the middle. My fingers felt like clumsy sausages trying to get that twist right. It kept slipping or being too loose.
- Cut the thread (longer than you think you need at first).
- Tie the ends into a secure knot to make a big loop.
- Hold the loop with both hands, twist it in the center about 5-6 times. This creates the bit that grabs the hair.
Then came the actual using it part. You hold the loop taut with your thumbs and index fingers inside either end of the loop. The idea is to open the fingers of one hand while closing the fingers of the other, making the twisted part slide across your skin, trapping and pulling out the hairs. Sounds easy? Let me tell you, coordinating those hand movements felt like learning to pat my head and rub my stomach backwards.
My first attempts were messy. I barely caught any hair, or I’d pinch my skin. The thread snapped a couple of times because I pulled too hard or got the angle wrong. It definitely wasn’t painless either, especially on the upper lip. A bit of a sting, for sure. I made sure my face was clean beforehand, just washed it simply, didn’t want any extra oils or dirt causing trouble.
Finding the Rhythm
I almost gave up after the first couple of tries. It was frustrating. But I kept at it, practicing mostly on my upper lip because it felt like the easiest place to start. Small sections, slow movements. Eventually, something clicked. I started to feel the right tension in the thread and got the hang of the scissoring motion with my hands.
The key really was practice. Getting the feel for how close to get the thread, how fast to move the twisty part, and keeping the skin pulled tight with my other hand (or sometimes just by stretching the area with my mouth, you know, making weird faces in the mirror).
After I got a bit better, I noticed some redness, which I guess is normal. I just splashed my face with cold water afterwards, sometimes put on a very basic, gentle moisturizer I had lying around. Nothing fancy. Tried to avoid putting makeup on right away or touching the area too much, seemed like common sense.
Where I’m At Now
So, do I still do it? Yeah, mostly. It’s convenient for quick touch-ups on my upper lip and chin. I’ve gotten much faster. It’s not perfect, sometimes I miss spots, but it does the job. Takes maybe 10-15 minutes now for the areas I tackle.
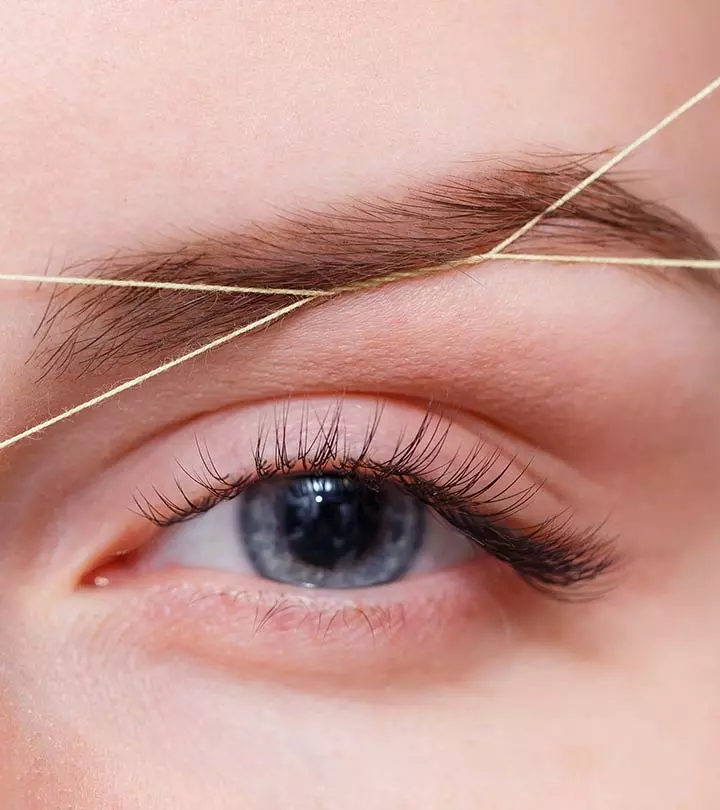
Have I tried eyebrows? Nope. That seems like a whole other level of precision I’m not ready for. Too easy to mess up the shape, I think. I leave those to the professionals or just tweeze strays.
Overall, learning to thread my own face was a bit of a process, definitely took some patience. It wasn’t some magic skill I picked up overnight. But now? It saves me time and hassle for the simple stuff. It’s just another tool in the kit, really. Pretty handy once you push through that initial awkward learning curve.
