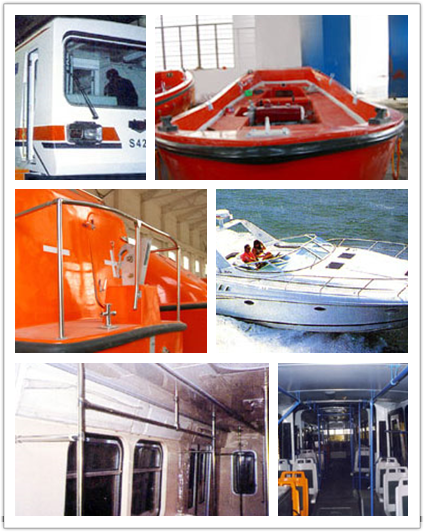
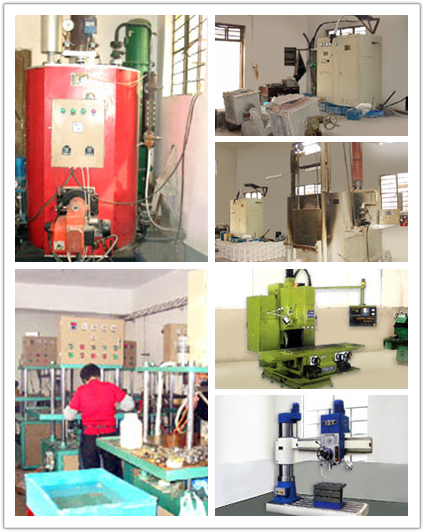
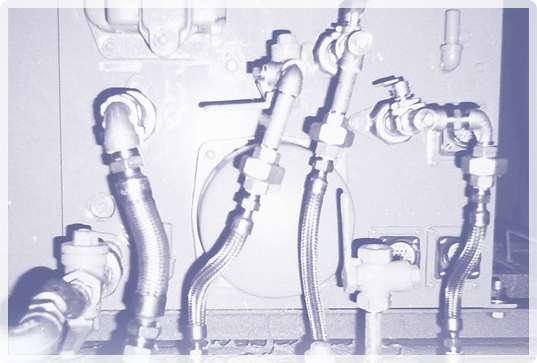
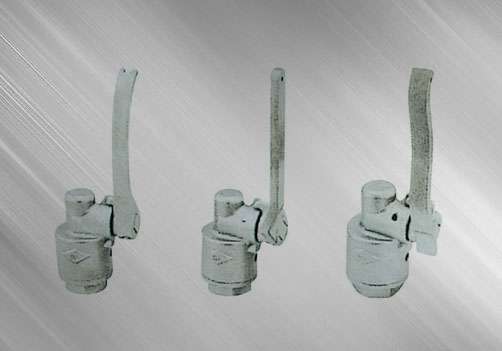
Easy Tourbillon Diagram Guide: See How it Works

by Cornell Yule

Alright, let’s talk about this tourbillon diagram thing I messed around with. It was a bit of a head-scratcher at first, but I think I kinda got the hang of it.

Easy Tourbillon Diagram Guide: See How it Works

So, I started by trying to figure out what a tourbillon diagram even is. Basically, it’s a fancy way to show how different things connect and influence each other over time, kinda like a flow chart but… fancier and circular. I saw a few examples online, and they looked pretty cool, so I thought I’d give it a shot. It looked like something you’d see in some high end business presentation, which is exactly why I thought I should learn to do it!

First up, the tools. I decided to use Python with the matplotlib library. I know there are other tools out there, maybe even some dedicated diagramming software, but I’m pretty comfortable with Python, and matplotlib can do just about anything if you wrestle with it enough.

I started by sketching out the basic structure of the diagram on a piece of paper. I knew I wanted to show the relationships between a few key project milestones. I figured out the number of circles I needed and how they should be spaced out.

Then came the coding part. Getting the circles plotted was easy enough – just basic trigonometry to calculate the x and y coordinates for each point. The tricky part was drawing the arrows to show the connections. I messed around with different arrow styles and angles until I got something that looked decent.

Here’s the basic process I followed:

Easy Tourbillon Diagram Guide: See How it Works
  • Import the necessary libraries: I used for plotting and numpy for calculations.
  • Define the data: This included the names of the milestones, their positions around the circle, and the connections between them.
  • Create the plot: I used to create a figure and an axes object.
  • Draw the circles: I used to draw the circles representing the milestones.
  • Add the labels: I used to add the labels to the circles.
  • Draw the arrows: This was the trickiest part. I used to draw the arrows between the circles. I had to play around with the arrow style and the connection style to get something that looked good.
  • Customize the appearance: I adjusted the colors, fonts, and sizes to make the diagram more visually appealing.

I ran into a few snags along the way, of course. Getting the arrowheads to point in the right direction was a pain. And making sure the labels didn’t overlap was another challenge. But after a bit of tweaking, I finally got something that looked like a proper tourbillon diagram.

Honestly, it’s not perfect. I’m sure there are better ways to do it. But it was a fun little project, and I learned a lot about matplotlib in the process. Plus, now I have a cool diagram to show off at the next project meeting. It might not mean anything to anyone, but it LOOKS impressive!

In the end, I realized that creating a tourbillon diagram isn’t just about making something pretty. It’s about clearly communicating complex relationships. And if I can do that with a little bit of Python and some fancy arrows, then I’m happy. I might even try to apply this to some other business presentations at my company!

You may also like

Leave a Comment